|
This is my Gravit Summative design for our technology class, and we were each assigned to create a logo, trademark, landscape, picture, or art, e.t.c... in this specific program. Now for those of you who are curious about how I created the the fireflies, you first create a circle by clicking the middle-upper symbol with the shapes on it, then click and drag your key across the screen into the desired shape and side. Then choose the color, then set it to "gradient radius" or something similar to that, and then set the opacity of the second color to zero. 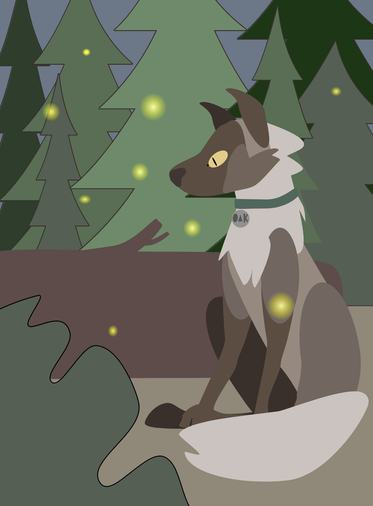 [A photograph of a lone, stray dog taken near a conservation park, enjoying the comfort and condolences of the fireflies.]
0 Comments
In the last lesson, we learned how to merge shapes and manipulate and alter shapes. Click on a shape, and on the right side, there will be a chart and a list of options, and for objects with points, apart from squares, can be controlled on how many vertices or "points" they have. As for merging shapes together, you have to click the button that looks like two overlapping black squares on the top-middle of the program, and click on union, that way, your shapes merge into one, and if you drag one of them around the border will still stay as it is.  In this particular lesson, we learned how to control layers, how alignments worked, and how to group objects together. First off, for controlling layers, you could either press on Shift+Command+Up/Down, if you're in need a layer to go all the way to the top or the very bottom. If you just want one object to move down one layer, click on Command+Up/Down Key. As for alignment, you can choose on the very right, eight options you can choose for the object you have selected. This could make for an excellent gradient affect, as shown in the top right image below. In order to group objects together, simply drag your key across the screen, and make sure the slightly-transparent blue box that appears on your screen, touch the objects you want to group together. Then release, and click simultaneously on your computer touchpad with two fingers, then a list of options will appear on your screen, select group, which has a G+Command in grey letters next to it. Click on that, and it'll group all the objects together.  In the fourth lesson, we learned on fills and borders. Fills being the coloration of and borders are the lines around a shape. 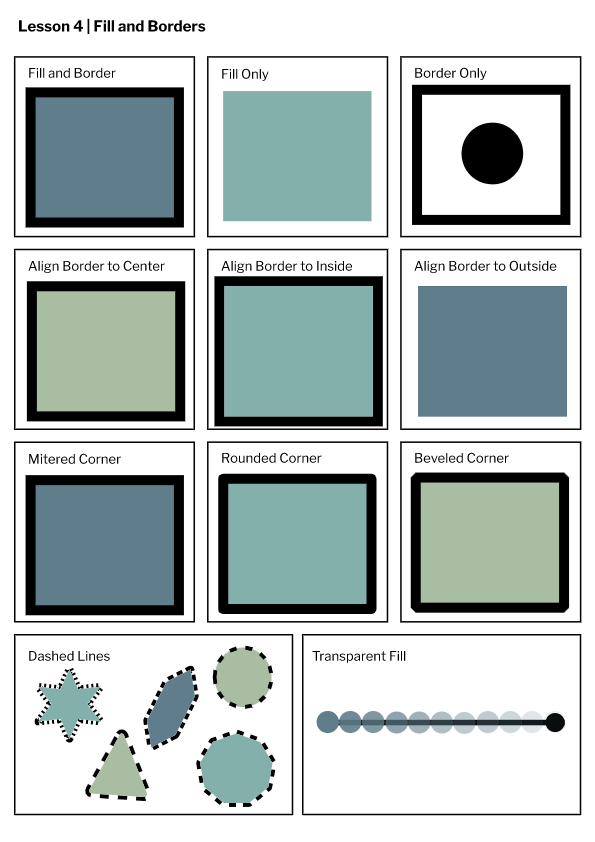 |
AuthorTree is a student, who likes to create digital art, scrapbook, hike in the woods, birdwatch, and write in their spare time. Archives
April 2020
Categories |
 RSS Feed

